Chocolate, coconut and peanut butter! Does it get any better?

Wild Friends is a new[er] brand of nut butters on the market, and they have great flavors including Chocolate Coconut Peanut Butter, which was my muse for these two recipes.

I have been trying to find a protein bar on the market that is not only is dairy-free but inexpensive, and it has become a trying task. So I decided to make my own. These bars are not only simple to make, but it makes a large batch and only used a fraction of the ingredients that I purchased.

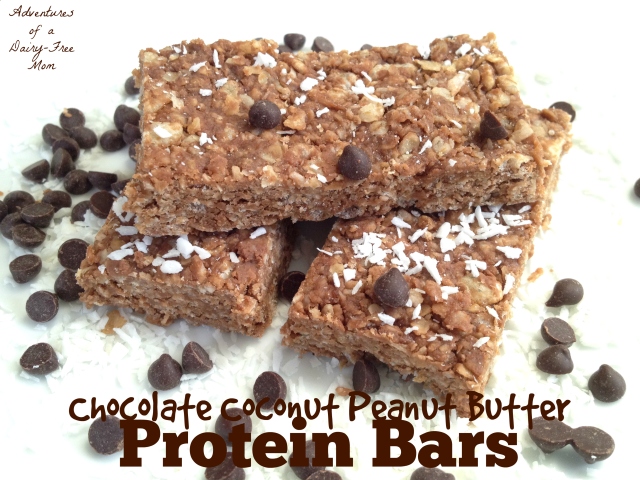
Chocolate Coconut Peanut Butter Protein Bars

Chocolate Coconut Peanut Butter Protein Bars

Approx. 20 small bars

2 cups oats

1 cup puffed brown rice cereal

3/4 cup Wild Friends Chocolate Coconut Peanut Butter

1/3 cup shredded coconut

1/2 cup brown rice syrup (I used Lundberg’s Organic Sweet Dreams)

2/3 cup brown rice protein powder (I used Growing Naturals Brand in Chocolate)

1 tsp vanilla

I combined the peanut butter and brown rice syrup and heated it in the microwave for a few seconds until it was slightly melted and easier to stir, you could also heat it on your stove top over low heat-this step made the process of mixing much easier. Add the additional ingredients and keep stirring until the mixture is uniformly combined.

I took my 16 cup (12.375″ L X 9.125″ W X 3.5″ H) Sterilite rectangle lidded container and lined it with parchment paper. I added the mixture and pressed it firmly and evenly. I snapped on the lid and stuck it in the refrigerator for about an hour or two (I lost track of time); once they were cooled, I removed the bars easily with the parchment paper and cut them into 20 small rectangular bars. Then I tossed them back into the container for storage. I recommend storing them in the refrigerator, however I did have one in my purse that I forgot about…it was in a Ziploc baggy for a day or so and it still maintained the shape and flavor.

I wanted to touch on brown rice syrup briefly. I have heard controversy over this item due to reports of arsenic in rice. For one, it is an ingredient in almost every organic, natural, vegan etc bar, and two I felt comfortable using this Lundberg brand because they are taking precautions and testing the levels of arsenic in their rice as part of their comprehensive food safety plan.

And now for this masterpiece…

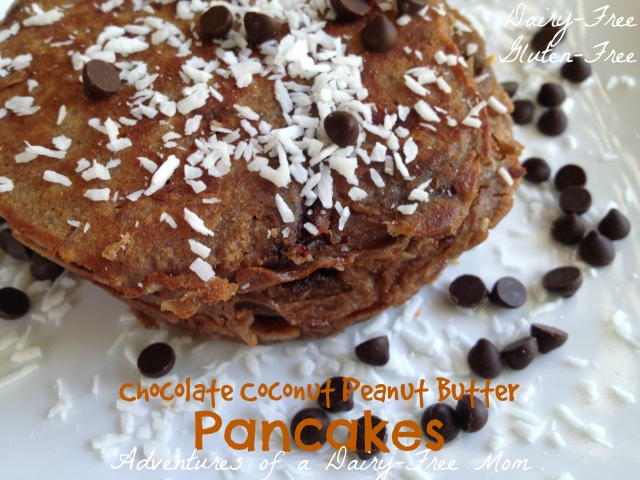
Chocolate Coconut Peanut Butter Pancakes

Chocolate Coconut Peanut Butter Pancakes

Approx. 4-6 depending on size

2 eggs

1 ripe banana

1/2 cup Wild Friends Chocolate Coconut Peanut Butter

2 tbsp chocolate chips (I used Enjoy Life minis)

2 tbsp shredded coconut

Optional:

Coconut oil for cooking

A little extra coconut and chocolate chips to sprinkle on top (highly recommended)

Mash the banana, then add the eggs and mix well; add the remaining ingredients and mix until relatively smooth. I heated a pan on my stove top to medium-low and added a little coconut oil to keep the pancakes from sticking.  I put about 1-2 tablespoons of the mixture into the pan; when they have formed bubbles on top that have burst they are ready to be flipped (just like normal pancakes). These don’t take long to cook!

When they are done, grab a plate and stack ’em up. I didn’t add any syrup or additional peanut butter, just a sprinkle of coconut and chocolate chips on top. I’m not even exaggerating, these were like heaven in my mouth. Next time around, I will be making a bigger batch!

Enjoy 🙂

P.S. This post was not sponsored by Wild Friends. All opinions and ideas are my own.

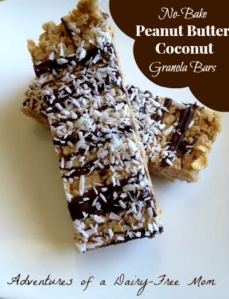
No-Bake Peanut Butter Coconut Granola Bars

I was at the grocery store the other day and I came across a bottle of Bee Free Honee, its texture is just the same as honey but it’s made with apples instead…pretty awesome right?

I knew I wanted to try it out on something other than a peanut butter and honee sandwich, so thus the granola bar was born!

No-Bake Peanut Butter Coconut Granola Bars (V, DF, GF)

No-Bake Peanut Butter Coconut Granola Bars
Yields: Approx. 10

Granola Bars:

2 cups gluten-free oats
1 cup brown rice cereal
1 cup peanut butter
1/2 cup finely shredded coconut
1/4-1/2 cup melted coconut oil
1/4 cup bee free honee

Topping (optional):

1/4 cup enjoy life chocolate chips
1/8 cup finely shredded coconut

Combine all of the ingredients, I used closer to 1/2 cup of coconut oil, just make sure that it is coated well and the coconut oil will help to hold the bars together when it returns to its solid state. Place it in an 8-inch square baking dish (larger if you want a thinner bar, and smaller if you’d like a thicker bar) that is lined with parchment paper. Firmly press the mixture into the dish.

Stick the baking dish in the freezer for 20 minutes. While the mixture is in the freezer take the 1/4 cup of chocolate chips and melt them. Once you remove the dish from the freezer remove from the mixture by using the parchment paper.

I put the melted chocolate in a sandwich baggy and cut off a corner and created a zig-zag pattern on the top of the bars. Then I sprinkled on the 1/8 cup of coconut. Once the chocolate hardens, cut them into bar shapes.

Since coconut oil has a low melting point, it is best to store the bars in the refrigerator. Also, if you are packing them to go you may want to keep them someplace cool.

Enjoy!

P.S. I have been posting on my Instagram account, if you have Instagram be sure to follow me, but if you don’t you can click on the pictures that show up to the right and it will take you to my Instagram so you can still see what I’m up to 🙂

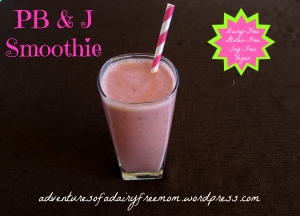
PB&J Smoothie

I made this PB&J smoothie for breakfast this morning, and it was a hit for me and the toddler! It was incredibly filling as well. I have been trying to find and make more recipes including PB2, because well…I love peanut butter, but it can be a little fattening eaten in mass quantities.

Yummy PB and J Smoothie

PB&J Smoothie

Makes: 24 ounces or 3 cups

1 1/2 Cups Unsweetened Original Almond Milk

1 Cup Frozen Strawberries

1/2 Banana

2 Tbsp PB2

Optional:

1 Tbsp Agave or Honey

There is nothing too difficult about making this smoothie, just dump all of the ingredients into the blender and blend it up until you reach your desired consistency. I added a little bit of agave to give it some sweetness. Easy-peasy!

I break into song every time I talk about peanut butter and jelly, so here is a lovely video for your entertainment!

 🙂

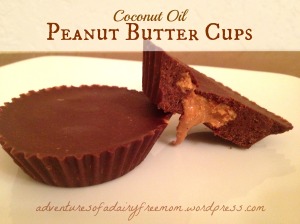
Coconut Oil Peanut Butter Cups

Say no to Reese’s and make these decadent peanut butter cups instead! Reese’s actually used to be one of my favorite candies, because I love peanut butter,  but I can’t tolerate sweets like I used to…that’s probably a good thing though.

These peanut butter cups are insanely easy to make, and they satisfy your chocolate cravings immediately. Yummmm! My sister-in-law made me a dairy-free coconut oil fudge for Christmas that was so good, and I loved the combination of vanilla and almond together, so I thought it would add a nice flavor profile to this as well because I love the flavor of almond extract. I made a batch of these with out the extracts too and they were still amazing…so you decide 🙂

Coconut Oil Peanut Butter Cups. Did I mention they are vegan too

Coconut Oil Peanut Butter Cups
Makes 10 peanut butter cups

1/2 cup coconut oil
1/2 cup peanut butter + 3tbsp and 1tsp for filling
1/2 cup cocoa powder
1/4 cup agave or honey
1/2 tsp vanilla extract (optional)
1/4 tsp almond extract (optional)
10 baking cups

Put all the ingredients into a sauce pan (minus the 3tbsp+1tsp peanut butter) and set your stove to the lowest setting. You just want the ingredients to get warm enough for the coconut oil to melt, this should only take a minute or so.

Once the ingredients are melty and magical, remove the sauce pan from the stove and turn it off. Set out your baking cups, and pour one tablespoon of the chocolate mixture into each of the cups. Then take a teaspoon size dollop of peanut butter and put it on top of the chocolate (there’s no need to spread it evenly). Then pour another tablespoon of the chocolate on top, if there’s any chocolate left I give you permission to eat it by the spoonful 😉

Place the peanut butter cups on some type of device to keep them flat and easy to transport and put them in the freezer, I left them in for an hour while I was cooking dinner but they may take less time; this step just helps them to harden faster.

When they feel hard, peel the baking cups off and you should be left with a Reese’s look-alike. Since these are made with coconut oil and can melt at room temperature it is best to store them in an air tight container in the fridge…if they even last that long!

Happy Munching 😉

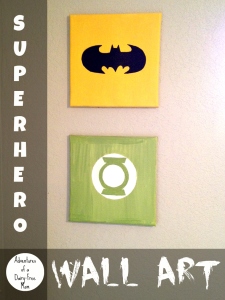
Superhero Wall Art

Long time no see! I hope everyone has had a wonderful January thus far. I have a great recipe to share with you tomorrow that I know you will LOVE but for today we’re getting a little crafty.

I happen to have a superhero fan, and I’ve been trying to figure out a way to transform the nursery style of decor to something a toddler would love without spending much money, if any.

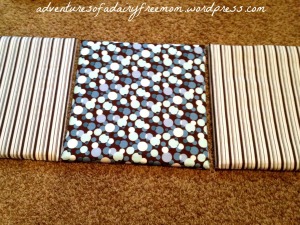
I made these a little over two years ago to hang on the wall, they were incredibly easy to make and looked really cute. I took canvases, cut some batting into the same square shape of the canvas and then cut the fabric in a larger square than the canvas. I placed the batting on top of the canvas and held it in place with a little hot glue. I then laid the fabric over the top and bunched/folded it in the back and used the hot glue gun to glue it in place. They were incredibly easy and inexpensive to make.

Fabric Canvas art

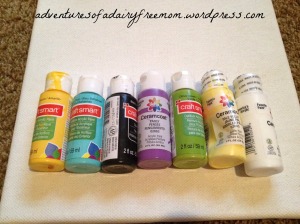
Since I like to re-use products, I took the fabric and batting off and peeled the little bits of hot glue off. Voila! A clean canvas ready to paint! I had a small stash of acrylic paints in the cupboard and I didn’t want to buy more, so some brainstorming took place.

Canvas painting

Any guesses of what this is going to turn in to?

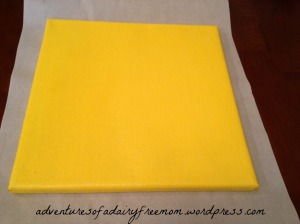
Canvas painted yellow

I had one of those foam paint brushes that cost less than a dollar and a paintbrush that I used out of a children’s watercolor set. I also used a black and green marker to draw out the designs. For this first canvas, I used to foam brush to paint the canvas an all over yellow. While that was drying, I painted my second canvas white in the center, and once that dried I cut out a paper circle, stuck it in the middle (or at least I tried to center it) and then painted the green color on top. Once the base layers were completely dry on both canvases, I took my markers and drew the designs. I then took the paint brush and painted the inside of my outlines…oh and I obviously removed the paint from the brushes before using a new color.

Superhero Wall Art

P.S. I never said I was good at free-hand drawing, but I think they turned out pretty awesome and they didn’t cost anything to make!

I encourage you to look around your house and find something that you can re-purpose. And of course have fun doing it!

Happy Crafting 🙂

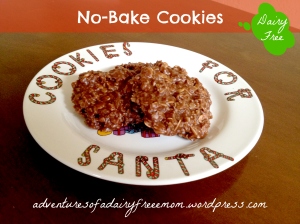
Dairy-Free: No-Bake Chocolate Peanut Butter Cookies

I’ll just get the bad news out-of-the-way so we can focus on the good news! This past week I’ve failed on three separate occasions and I never, okay hardly ever fail! I tried to make peanut butter truffles, easy fudge and cranberry coffee cake and all of them turned out to be sub par. Just goes to show that you can’t believe everything you read on the internet even in regards to recipes.

But my saving grace, we shall call her Heather, restored my faith in baking or lack their of, and shared a chocolate peanut butter no-bake cookie recipe with me that I transformed into a dairy-free one!

DairyFree No Bake Cookies

Dairy-Free No-Bake Cookies

2 cups sugar

4 tablespoons cocoa

1/2 cup Earth Balance

1/2 cup unsweetened coconut milk

1 cup peanut butter

1 tablespoon vanilla

3-4 cups oats

I combined the sugar, cocoa, earth balance, coconut milk, peanut butter and vanilla in a large pot and brought it to a boil, stirring constantly. Let it boil for a minute or two and then remove from heat. Add oats to the pot and stir until the mixture is well mixed. It should be thick, I started out with three cups of oats per the recipe but actually needed to increase it to 4 cups. Drop the cookies onto wax paper and let cool.

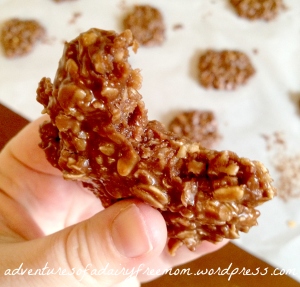
DairyFree Cookie

I’ve actually never made these incredibly simple cookies but they were so moist and yummy! I also made a big batch of my Homemade Granola but added in dried cranberries and walnuts and another batch of my Chocolate Raspberry Shortbread Cookies; I made this batch with gluten-free all-purpose flour and it changed the texture of the cookies a bit, I think that more liquid would have been beneficial to add in.

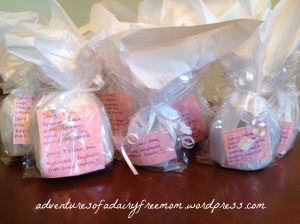
I packaged up the goodies to share with others! Sharing is caring 😉

Dairy Free Goody Bags

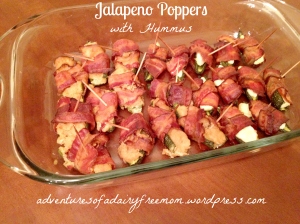
We have a yearly Christmas Eve pizza party that we are attending this evening. I have a big bag of fresh jalapenos sitting on my counter, can you guess what I’m contributing? I’ll post the recipe later 🙂

UPDATE!

I made Jalapeno Poppers! I did half of the batch with your traditional cream cheese for all the cow milk lovers and half of the batch with hummus. They turned out pretty well but I will definitely be tweaking this recipe until it is perfect. I halved 12 jalapenos length wise, cut the stem off and cleaned out the middle. I then put a dollop of hummus/sour cream in the jalapeno, wrapped it in cooked, uncured and nitrite free bacon from Trader Joe’s and stuck a tooth pick through the middle to hold it all together. I cooked them at 400 degrees for 20 minutes! Yummo!

Dairy Free Jalapeno Poppers

Happy Holidays 🙂

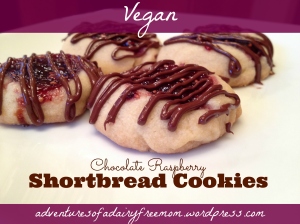
Vegan Chocolate Raspberry Shortbread Cookies

Christmas is in the air! This was my first holiday recipe and it turned out so good! I can’t wait to share the other goodies with you that I have up my sleeves.

My mom always makes cookies, breads and candies for Christmas and my two favorite things are her thumbprint cookies and the Russian tea cakes. These shortbread cookies are my take on her thumbprint cookies 🙂

The recipe is incredibly simple. I melted chocolate to drizzle on the top and I burnt it twice so, the moral of this story is watch your chocolate! I tried over the stove and in the microwave, you could use a double broiler as well.


Vegan Chocolate Raspberry Shortbread Cookies


Vegan Chocolate Raspberry Shortbread Cookies

Yields approx. 40 cookies

1 1/2 cups of dairy-free butter, I use Earth Balance

1/4 cup vegetable oil

4 cups flour

1 cup sugar

1 tsp vanilla

Jar of raspberry jam

2 bags of dairy-free chocolate chips, I use Enjoy Life

Pre-heat the oven to 350. Cream together the butter, oil and vanilla. Add in the sugar and flour and mix together. The dough will have the consistency of play-dough.

Roll the dough into balls, mine were similar in size to a ping-pong ball. Press your thumb in the middle of the dough ball to create a little bowl to hold the jelly. Add a tsp or so of raspberry jelly in the middle of the cookie. Bake for 12-15 mins.

While the cookies are baking  melt your chocolate. I made my cookies in separate batches, which by the way this dough does great in the freezer, so I guesstimated how much chocolate to melt for each batch. Put the melted chocolate in a baggy with a small opening at the tip and drizzle the chocolate on top of the cookies after they have finished baking.

These cookies are so good and taste just like the kind filled with butter and eggs! They are a perfect combination of soft and crunchy, and are definitely a must for the holiday!

Happy Baking 🙂


Dairy-Free and Gluten-Free: Toddler Breakfast

I hope you all are embracing the holiday season and enjoying your friends and family! As you may have noticed, I haven’t posted a blog in a while. I don’t want you all to think I’ve forgotten you…because I haven’t, so wipe away those tears. I have just become busier than I have been in quite some time, but I won’t bore you with all the details.

I have a couple things that I would like to share in the upcoming days and weeks, and there may or may not be some recipes for all those sweet treats that we must devour during the holidays. So many of the recipes call for dairy in some form or another, but I am thinking that we can treat ourselves to something just as good, if not better, than the original versions.

Over Thanksgiving I made an Apple Crisp, it was actually called something else but my brain is not working on all its cylinders right now, and we served it up with ice cream. So the obvious question was (to those who can eat dairy), “do you want coconut milk ice cream or cow milk ice cream?” This received a little chuckle, and then the adage that when its put that way the coconut milk ice cream sounds much more desirable. So that brings me to wonder, how do you classify your “milk” products? I can’t be the only one that refers to dairy as cow milk! Here is where my mom would mention that I used to call milk, foot milk…maybe I should go back to calling it that instead, hehe. Okay, I have gotten side tracked.

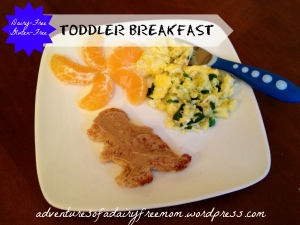
Dairy Free Gluten Free Toddler Dino Breakfast

Let’s talk breakfast! You may notice a trend here, eggs and toast! This breakfast was incredibly simple, I scrambled some eggs and tossed in some fresh chopped baby spinach, just a handful or so. Peeled a little cutie and made a cool design! And popped a piece of gluten and dairy free bread in the toaster, cut it into an awesome dinosaur shape with my amazing skills and spread a little peanut butter on top. Simple and nourishing! As a side note, after the toddler dug into breakfast, I realized I could of turned this into a little scene and put the eggs at the bottom of the plate and had the dinosaur walking on them, and then have the little cutie sun shining down from above. Next time around! I basically ate the same thing, but I had a plain ‘ole boring square piece of toast. Oh, and I put Earth’s Balance on it instead of peanut butter.

Happy Eating 🙂


Dairy-Free: Green Chicken Enchiladas

My mother makes these green chicken enchiladas that in my opinion will make you not want enchiladas any other way…they are that good! My recipe differs from hers just a smidge, the biggest differences being that my recipe has added beans and is sans cheese.

If you feel like you can’t live without cheese, you can always use a dairy-free alternative like Daiya. This is another meal that I double, so that it can be eaten for multiple meals or you could freeze half of it…unless you are cooking for a larger group of people.

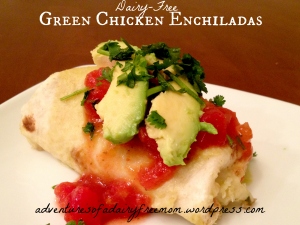
Dairy Free Green Chicken Enchiladas

Green Chicken Enchiladas

One pound chicken breasts, seasoning optional: oil, garlic, salt, pepper

3 ½ cups green chile enchilada sauce

10 ct medium/soft taco size flour tortillas

¼ bunch of fresh cilantro

1 cup diced green chiles

2 cups of refried beans

Optional:

Salsa

Avocado

Fresh chopped cilantro

The first step is to cook the chicken breast, seasoning is optional, and when the chicken is fully cooked shred it. I typically shred the chicken with a fork, and just scrape it along the breast until it is completely shredded. You could always cheat and get a roasted chicken from the grocery store and just shred it up 😉

Set aside one and a half cups of green enchilada sauce. Finely chop the cilantro, and mix it with the green chiles and the remaining green enchilada sauce. Spread some of the sauce (without cilantro) over the bottom of the baking dishes. I use two glass baking dishes so the recipe is easily split, the size I use is a 2qt, and the dimensions are 21x21x5.

To assemble the enchilada, I lay the tortilla flat, and take a large spoonful of beans and spread in the center, and then I place about 1.5 ounces of chicken on top of the beans, and then pour a couple large spoonfuls of sauce (with cilantro) on top. Then you can fold it like a burrito, to do this you fold two opposite sides towards the middle and then starting at the bottom of the tortilla roll it up.

I repeat these steps with the additional tortillas. Once I am finished, I use the remaining sauce (without cilantro) to pour over the tops so they are nice and coated, however if you have extra of the cilantro sauce you could pour that over the top as well. Bake the enchiladas at 350 for 20-30 minutes. I find that the time varies a little due to the type of bake ware you use.

These enchiladas are great on their own, but I like to garnish it with a little salsa, avocado and a sprinkle of fresh chopped cilantro. I hope that you enjoy these dairy-free green chicken enchiladas as much as I do!

Happy Cooking 🙂